

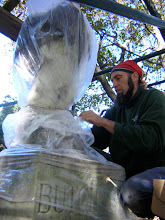
Here's some photos of the stages in a practice job I've been doing for some friends... the final plaque is to be installed in the space of two bricks. Here I'm pencilling in the letters... using a great art deco font based on the one at the Lawrence Hargrave house in Point Piper.

The next step is completing v-cut lettering. Grahame and Matthew have been mentoring me in it... and I'm happy to report that I'm coming along. Still very slow... and with a long way to go, but becoming precise... and starting to get a result which I'm at least half happy with....

Here's the panel in progress... laid out along with my tungsten-carbide lettering chisels and lightest mallet.

The v-cut letters ready for leading.
The lead lettering is a slow progress... at least for us so far: where Gordon Brown said a good tradesman was expected to complete 60 letters a day (layout, cut, lead, clean)... I think I'm up to maybe 6... Matthew may be at about 8... and Grahame's not saying... but, we're definitely not up to the old standards yet!

Here's the letters ready for the final tapping-in and shaping...
I'll do some more posts on the techniques... or maybe I'll try and get Gordon to do a guest entry (as he's written up quite alot of reference material on the old lettering techniques)... but essentially it involves drilling angled holes into the letters, cutting lead into thin strips, shaping the letter roughly in lead, pounding the lead in with an ebonite mallet (also called vulcanite it is a hardened rubber product which is just softer than marble... allowing you to pound in the lead without leaving impact marks on the stone), cutting back the excess, pounding the lead in again, cutting back the excess and starting to form the letter, tapping- in the lead again, cutting the letter forms, giving a flat-face final tapping-in, cutting the final form, and then cleaning and finishing.
I'll post some photos of the final plaque after its installed...
Here's a photo of a finished shadow lettering plaque I did for this year's HIDDEN Art Show at Rookwood...

No comments:
Post a Comment